It was a crisp Saturday afternoon in late October, the kind of day when the air smells like a mix of fallen leaves, wood smoke, and the faint promise of something sweet waiting on the kitchen counter. I was standing at the sink, whisk in one hand, a half‑full pumpkin puree can in the other, when my teenage son burst in, eyes wide, demanding a snack that could survive the inevitable “Are we having s’mores tonight?” question. The moment I lifted the lid on the mixing bowl, a cloud of fragrant steam hit me – warm notes of cinnamon, nutmeg, and that unmistakable earthy sweetness of pumpkin swirled together, instantly conjuring memories of family campfires and Thanksgiving tables. That instant, that aroma, was the spark that turned a simple idea into what I now call the ultimate fall cookie: Pumpkin S’mores Cookies.
What makes these cookies stand out isn’t just the combination of pumpkin and s’mores, but the way each element plays off the other. The pumpkin adds a tender, slightly dense crumb that holds the gooey marshmallows and melty chocolate chips in a perfect hug, while the graham cracker crumbs give a subtle crunch that reminds you of a classic s’more’s biscuit base. Imagine biting into a cookie that delivers that first soft, buttery bite, followed by a burst of sweet, toasted marshmallow and a lingering hint of smoked chocolate – it’s like autumn captured in a single mouthful. I’ve watched friends and family devour a batch in seconds, and the best part? The recipe is forgiving enough for beginners yet sophisticated enough to impress seasoned bakers.
But wait, there’s a secret trick that takes these cookies from good to unforgettable, and I’ll reveal it in a moment. Have you ever wondered why some pumpkin cookies turn out dry while others stay moist and tender? The answer lies in a tiny detail that most recipes overlook, and it’s right here in this guide. By the end of this article, you’ll not only master the perfect pumpkin‑s’mores cookie but also gain a few kitchen hacks that will elevate all your fall baking adventures.
Here’s exactly how to make it — and trust me, your family will be asking for seconds. Grab a bowl, preheat your oven, and get ready to embark on a flavor journey that feels like a cozy campfire tucked inside your own home. The steps are simple, the ingredients are pantry‑friendly, and the result is a cookie that sings the anthem of autumn. Let’s dive in and start mixing, because the best part is just around the corner.
🌟 Why This Recipe Works
- Flavor Depth: The marriage of pumpkin puree with classic s’mores ingredients creates layers of taste that evolve with each bite. The earthiness of pumpkin balances the sweetness of marshmallows and chocolate, while a hint of cinnamon adds warmth.
- Texture Harmony: A soft, cake‑like interior meets crunchy graham cracker crumbs and the occasional snap of chocolate. This contrast keeps the palate engaged and prevents the cookie from feeling one‑dimensional.
- Ease of Preparation: Most of the work happens in a single bowl, meaning less cleanup and more time to enjoy the process. Even novice bakers can follow along without feeling overwhelmed.
- Time Efficiency: With a prep time of just 15 minutes and a bake time of 30 minutes, you can have fresh cookies on the table before the kids finish their homework.
- Versatility: While the base recipe shines on its own, it serves as a canvas for endless variations – think toasted pecans, a drizzle of caramel, or a sprinkle of sea salt.
- Nutrition Boost: Pumpkin adds beta‑carotene, fiber, and a subtle sweetness that lets you reduce added sugars without sacrificing flavor.
- Crowd‑Pleaser Factor: The familiar s’mores flavors appeal to both kids and adults, making these cookies a hit at holiday gatherings, potlucks, or a simple family snack.
🥗 Ingredients Breakdown
The Foundation
The base of any great cookie starts with flour, and we’re using 1 ½ cups of all‑purpose flour. This amount provides the structure needed to hold the pumpkin puree and s’mores mix‑ins without becoming too dense. If you’re aiming for a gluten‑free version, a 1‑to‑1 substitution with a blend of rice flour, tapioca starch, and potato starch works beautifully, though the texture will be slightly more crumbly.
Aromatics & Spices
Cinnamon (1 tsp) and nutmeg (½ tsp) are the heartbeats of autumn. They bring warmth and a subtle spice that pairs perfectly with pumpkin’s natural sweetness. Freshly ground spices give a brighter flavor; if you only have pre‑ground, give them a quick toast in a dry pan to revive their potency before adding them to the dough.
The Secret Weapons
Melted unsalted butter (½ cup) adds richness and a glossy finish to the cookies. Because the butter is melted, it blends seamlessly with the pumpkin puree, creating a smooth batter that spreads evenly. Vanilla extract (1 tsp) is the silent hero, enhancing the overall flavor profile and tying together the sweet and spicy notes.
Finishing Touches
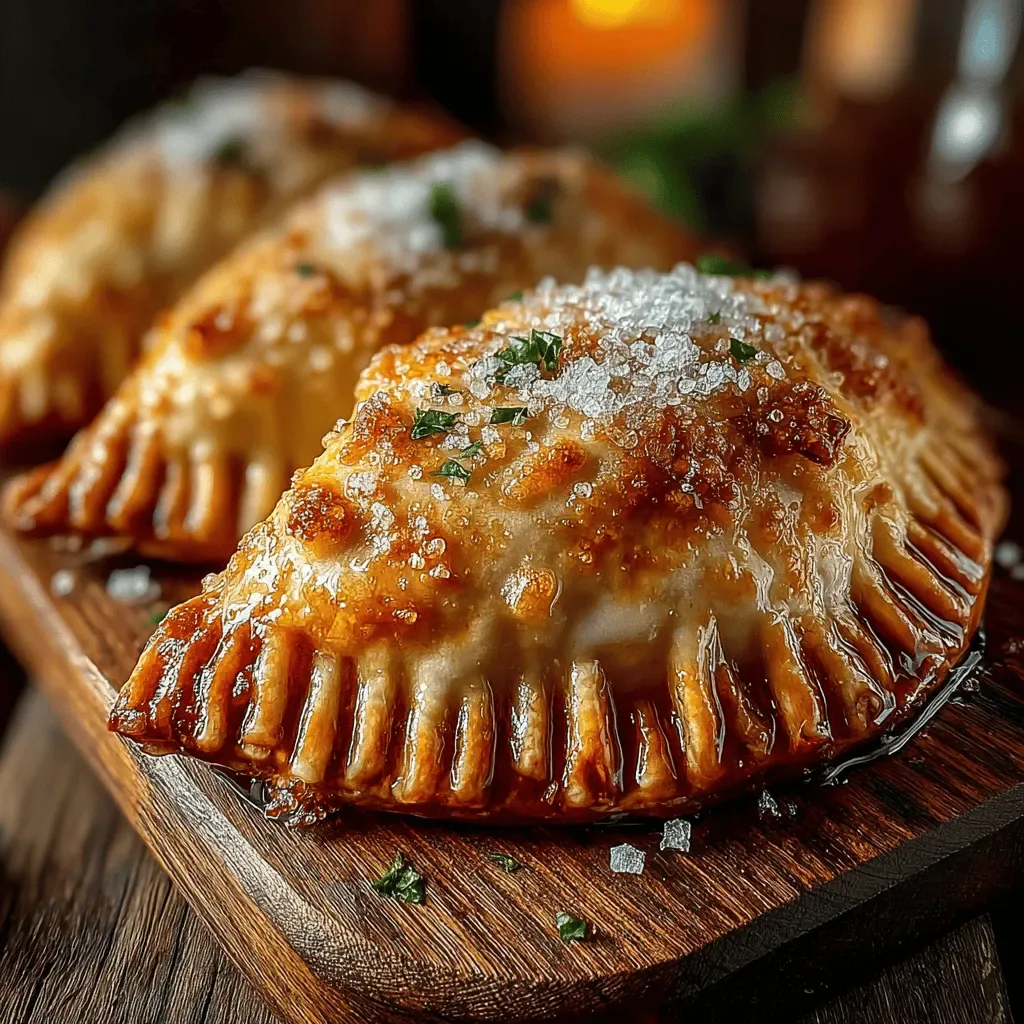
While not listed in the core ingredient list, the s’mores components—mini marshmallows, chocolate chips, and graham cracker crumbs—are what truly define this cookie. Choose high‑quality dark chocolate chips for a bittersweet contrast, and opt for mini marshmallows that melt into gooey pockets rather than turning rubbery. For the graham cracker crumbs, crush them lightly so they retain a bit of texture but still blend into the dough.
With your ingredients prepped and ready, let's get cooking. Here’s where the fun really begins…

🍳 Step-by-Step Instructions
Preheat your oven to 350°F (175°C) and line two baking sheets with parchment paper. While the oven warms, take a moment to inhale the scent of the spices you’ve just measured; the aroma alone should make your kitchen feel like a cozy cabin. This is the perfect time to gather all your mix‑ins—marshmallows, chocolate chips, and graham cracker crumbs—so they’re within arm’s reach. Trust me, having everything ready prevents that frantic scramble halfway through.
In a large mixing bowl, whisk together the melted butter and pumpkin puree until the mixture is smooth and glossy. You’ll notice the color deepening to a rich amber, a visual cue that the butter is fully incorporated. Add the vanilla extract, then whisk in the sugar—both brown and white if you’re using a blend—for a balanced sweetness that doesn’t overpower the pumpkin.
💡 Pro Tip: Sprinkle a pinch of cinnamon into the butter‑pumpkin mixture before whisking; it infuses the fat with spice, ensuring every bite has that warm flavor.In a separate bowl, sift together the all‑purpose flour, baking soda, and salt. Sifting aerates the flour, preventing clumps and giving the cookies a lighter crumb. Once combined, gradually fold the dry ingredients into the wet pumpkin mixture using a spatula, mixing just until you see no streaks of flour. Over‑mixing can develop gluten, leading to tougher cookies, so stop as soon as the dough comes together.
Now for the fun part: gently fold in the chocolate chips, mini marshmallows, and graham cracker crumbs. The marshmallows should be evenly distributed, creating pockets that will melt into gooey surprises when baked. If you prefer a more pronounced crunch, reserve a handful of graham crumbs to sprinkle on top of each cookie before baking.
⚠️ Common Mistake: Adding the marshmallows too early can cause them to sink to the bottom of the dough. Fold them in last and gently, preserving their shape.Using a cookie scoop or a rounded tablespoon, drop dough onto the prepared baking sheets, spacing them about 2 inches apart. Each mound should be about the size of a golf ball; they’ll spread slightly as they bake. For a decorative touch, press a few extra chocolate chips or a mini marshmallow onto the top of each cookie.
Slide the sheets into the preheated oven and bake for 12‑15 minutes, or until the edges turn a light golden brown and the centers look set but still soft. You’ll hear a faint crackling as the sugars caramelize—listen for that subtle sound; it’s the cookie’s way of telling you it’s ready. If you prefer a chewier center, pull them out at the 12‑minute mark; for a crispier edge, let them go the full 15 minutes.
Remove the cookies from the oven and let them cool on the sheet for 3‑4 minutes. This short rest allows the cookies to set, preventing them from breaking apart when transferred. Then, using a silicone spatula, gently lift them onto a wire rack to cool completely. As they cool, the marshmallows will firm up just enough to give that perfect bite‑size chew.
Once cooled, store the cookies in an airtight container. They’ll stay soft and flavorful for up to a week, and the flavors will continue to meld, becoming even more delicious. If you’re planning to serve them the next day, warm them briefly in a 300°F oven for 5 minutes to revive that fresh‑out‑of‑the‑oven magic.
💡 Pro Tip: Place a slice of fresh apple in the container with the cookies; it will keep them moist without making them soggy.
And there you have it! But before you dig in, let me share some tips that will take this from great to absolutely unforgettable…
🔐 Expert Tips for Perfect Results
The Taste Test Trick
Before you bake the entire batch, scoop out one cookie and bake it as a test. This tiny experiment lets you gauge sweetness, texture, and the meltiness of the marshmallows. If it’s too sweet, a pinch of extra salt can balance it; if it’s not gooey enough, add a few more mini marshmallows to the next batch.
Why Resting Time Matters More Than You Think
Allow the dough to rest in the refrigerator for 30 minutes before shaping. This short chill lets the flour fully hydrate and the butter solidify slightly, resulting in cookies that spread less and hold their shape better. I once skipped this step and ended up with flat, crispy edges—lesson learned!
The Seasoning Secret Pros Won’t Tell You
A dash of smoked paprika or a pinch of espresso powder can deepen the chocolate flavor, giving the cookie a subtle, sophisticated undertone. It’s a trick I picked up from a pastry chef who swears by “hidden spices” to elevate classic desserts.
The Perfect Baking Sheet
Heavy‑duty, dark‑colored baking sheets conduct heat more evenly, promoting a uniform bake. Light‑colored sheets can cause the bottoms to brown too quickly, leaving the centers undercooked. If you only have a light sheet, rotate the pan halfway through baking.
Cooling Is Not Optional
Resist the urge to devour the cookies straight from the oven. Letting them cool on a wire rack allows steam to escape, preventing sogginess and preserving that coveted crisp edge. Trust me, patience is the secret ingredient that makes the difference.
🌈 Delicious Variations to Try
One of my favorite things about this recipe is how versatile it is. Here are some twists I've tried and loved:
Maple‑Pecan Crunch
Swap half of the graham cracker crumbs for toasted pecan pieces and drizzle a thin ribbon of pure maple syrup over the cookies before baking. The nuts add a buttery crunch, while the maple deepens the autumnal sweetness.
White‑Chocolate & Cranberry Burst
Replace dark chocolate chips with white chocolate and fold in dried cranberries. The tartness of the cranberries cuts through the richness, creating a bright, festive flavor perfect for holiday gatherings.
Spiced Chai Infusion
Add a pinch of ground cardamom, ginger, and clove to the spice blend, and use chai‑infused chocolate chips. This variation brings a warm, exotic twist that pairs beautifully with the pumpkin base.
Double‑Chocolate Delight
Incorporate cocoa powder (2 tbsp) into the dry ingredients and use both dark and milk chocolate chips. The result is a richer, more indulgent cookie that satisfies serious chocolate cravings.
Vegan & Gluten‑Free Edition
Swap the butter for coconut oil, use a gluten‑free flour blend, and choose dairy‑free chocolate chips and marshmallows. The texture remains wonderfully chewy, and the flavor stays true to the original.
Caramel Swirl Surprise
After shaping the dough balls, drizzle a spoonful of caramel sauce on top and use a toothpick to swirl it gently into the surface. The caramel pockets melt into gooey ribbons that complement the pumpkin and chocolate beautifully.
📦 Storage & Reheating Tips
Refrigerator Storage
Place cooled cookies in an airtight container lined with a parchment sheet. They’ll stay fresh for up to 7 days, retaining their softness thanks to the natural moisture from the pumpkin and marshmallows. If you notice any condensation, simply lift the top layer and replace the parchment.
Freezing Instructions
For longer keeping, arrange cookies in a single layer on a baking sheet and freeze until solid, then transfer to a zip‑top freezer bag. They can be frozen for up to 3 months. When you’re ready to enjoy them, thaw at room temperature or pop them straight into a 300°F oven for 5‑7 minutes to revive that fresh‑baked aroma.
Reheating Methods
To re‑crisp the edges without drying out the interior, warm the cookies on a baking sheet in a preheated 350°F oven for just 3‑4 minutes. For a microwave “soft‑center” treat, heat a single cookie for 10‑12 seconds; the marshmallows will become delightfully gooey.